2. 3D physics for the mobile web!
This article is a part of a series, composed of:
- Part 0: Introduction
- Part 1: Dynamic texture drawing
- Part 2: 3D physics for the mobile web ⬅️ You are here.
- Part 3: Gluing all together with ECS (Entity-Component-System)
Do we really need 3D physics? Isn’t it slow?
One interesting aspect of using a physics engine is the oppportunity of emergent gameplay. ‘Emergent gameplay’ refers to unpredictable and complex behaviors that arise from simple interactions within the game’s mechanics.
For example, players might strategically move blocks to create shields or alter enemy paths by blocking routes.
There are bunch of tools in JavaScript to make this magic happens, such as Oimo.js, Ammo.js, and Physijs. (See the References section for more.)
For this project, I choose to use Cannon.js. Why? Well it’s super robust, a lot like Box2D (which I’ve used before), works well with Three.js, and is really fast on mobile devices (probably because it’s a bit older).
NOTE: [Jan 2024]: When I first talked about Cannon.js, it was an old but good tool. It hasn’t been updated in a while, and now Rapier appears to be its successor.
I’ve updated the References section accordingly. However, the principles shared here still provide valuable insights into working with physics engines.
Physics engines run alongside ‘in parallel’ with the rest of the world of our game. In a game, everything happens frame by frame. For example, at 60 frames per second (fps), it’s 16 milliseconds (ms) between each frame.
Each frame is a snapshot of the game’s world at a moment. The physics engine keeps an eye on all the physical objects in the game. During these 16 ms, it runs its own simulation and updates each object’s state, like its position, its rotation, its velocity, and whether it had a collision, with which other objects, and at what speed.
At the end of this quick inner update, the physics engine lets us access all of this information; we have a fresh snapshot we can explore and use to render the next frame. For instance, if we see two objects crash very fast, like a bullet hitting an enemy, we can decide to take the bullet out of the game in the next frame, and to reduce the enemy’s health. We do this for every frame, for hundreds of objects, all the way until the game ends.
We need to configure the simulation with specific settings, such as the number of updates per frame and constant forces affecting all objects, such as gravity. Gravity is a continuous force that acts on every object during each update.
Let’s start by creating our physics world:
// Instanciate a new World that will handle all the physical objects and the simulation.
this.world = new CANNON.World();
// Set the gravity to -10 on the y-axis (this is a constant acceleration of 10m/s to the ground, things will fall as on Earth)
this.world.gravity.set(0, -10, 0);
// Set the debug renderer to see what's happening
this.debugRenderer = new CannonDebugRenderer(this.ts.scene, this.world);
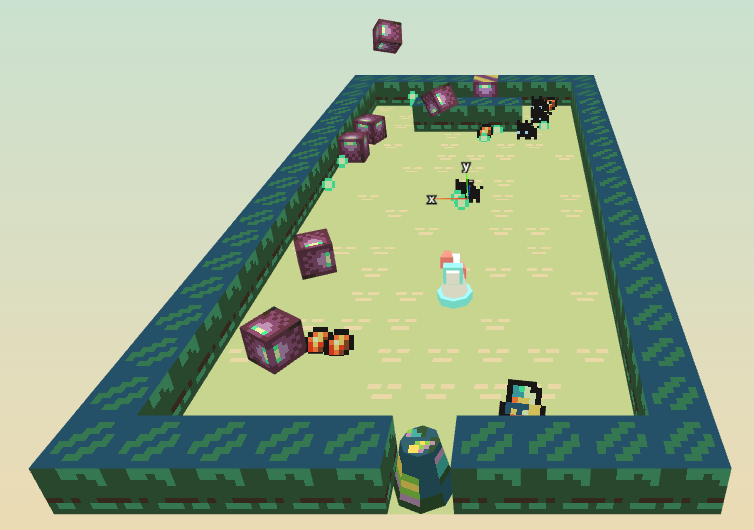
You can see the debug renderer here It shows a wireframe view of everything in the physics world.
As we use an Entity-Component-System (ECS, more about that in the next article), we also have to initialize the PhysicSystem:
export default class PhysicSystem extends System {
    constructor(world, attributes) {
        super(world, attributes);
        // Get a reference to the new Cannon.World() we just have created
        this.cannon_world = attributes.cannon_world;
        // The controller will track the player's input and translate them in force applied to the player object
        this.controller = attributes.controller;
        // Precision is how many updates Cannon.js will do each simulation step
        // Here, we aim for 3 updates during our 16 ms budget
        this.precision = 3;
    }
    // ...
}
Now, let’s see how the controller affects the player. This is applied for the player, which is linked to the controller:
// The controller's direction is a simple normalized (x, y) vector.
const dir = this.controller.state.dir;
// We constrain the power of the force we'll apply on the player
const power = 0.4;
// We compute the force applied on the player
// In our 3D physics engine, the player move on a 2D plan using the x and z axes:
// - x from the controller is converted to a x force
// - y from the controller is converted to a z force
let force = new CANNON.Vec3(dir.x, 0, dir.y)
    .scale(-1 * power);
// Finally, we apply this force to the player as an impulse (a force applied at a point of time)
// We can see this as a quick push every step
body.applyImpulse(force, body.position);
In physics engines, a body usually refers to an object.
Think of it as the object’s shape (or multiple shapes for complex objects).
When we create an entity, it gets its own body. For example, for a crate:
We define it’s size.
Three.js and Cannon.js, handle sizes differently, which can cause confusion, that’s why we apply a 0.4 on the sizes.
Collision groups help manage which objects bump into each other. For instance we don’t want a player’s bullets collide with themselves or with the player.
createCrate(position = new Vector3(), size = new Vector3(1, 1, 1)) {
  /* Create the geometry, the texture and the mesh, as shown in the previous article */

  // Define the crate's body shape,
  // Remember that the physical size is half the size of the mesh
  // we also remove a little offset of the body size, that's why we have this `0.4` instead of `0.5`
  // We do this to have smaller hitbox, it not mandatory, it just feels better in the game
  const box_size = new CANNON.Vec3(0.4 * size.x, 0.4 * size.y, 0.4 * size.z);
  const box = new CANNON.Box(box_size);

  // The crate's body
  const body = new CANNON.Body({
      mass: 1,
      position: position,
      shape: box,

      // Use collision groups to manage interactions
      // The crate belongs to a neutral group
      collisionFilterGroup: COLLISION_GROUP.NEUTRAL,
      // And It can interact with any group
      collisionFilterMask: COLLISION_GROUP.ALL
  })

  // Add the mesh and body components to the entity (more on this in the next article)
  this.ecsy.createEntity()
      .addComponent(ThreeMesh, { value: mesh })
      .addComponent(CannonBody, { value: body })
}
In this example, we have crafted the crate’s physical body and matched its visual appearance. By setting the collision groups, we ensure it interacts appropriately with other elements in the game world.
Next, we update the physics simulation each frame. For more information, you can refer to physicsystem.js:
// the simulation itself
// `delta` is the number of ms since the last render.
// As time is relative, it can be slightly more or less than our 16 ms target.
// So we use the real value to stay accurate with time.
for (let i = 0; i < this.precision; i++) {
    this.cannon_world.step(delta / this.precision);
}
After updating Cannon.js’ world, we want to sync it with the Three.js’ world. This is typically done at the end of the update loop, just before rendering.
// Find all entities with Mesh and CannonBody (physics) components
  this.queries.syncWithPhysics.results.forEach(e => {
      const mesh = e.getComponent(ThreeMesh).value;
      const body = e.getComponent(CannonBody).value;

      // Sync the mesh's position and rotation with the physics body
      mesh.position.copy(body.position);
      mesh.quaternion.copy(body.quaternion);
  })
This process guarantees that the physical interactions are reflected in the visual 3D world. Which is usually good.
That’s it for now. Congratulations on making it through this detailed technical article!
Next time, we’ll explore how to make everything work smoothly together using our ECS. See you here!
Stay tuned for more in the series!
References:
Physics Engines:
- Oimo.js: https://github.com/lo-th/Oimo.js/
- Ammo.js: https://github.com/kripken/ammo.js/
- Physijs: https://chandlerprall.github.io/Physijs/
- Cannon.js: https://schteppe.github.io/cannon.js/
- Rapier: https://github.com/dimforge/rapier/